Sunday, August 21, 2011

BBQ Tofu, Bruschetta in a Jar, and a Stupid Move

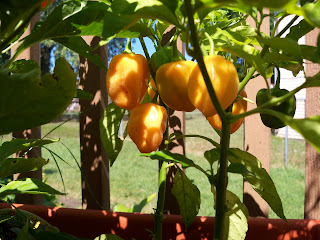
Hot Lemon Peppers in the lower left corner and Tabasco Peppers in the right half of the picture
My pepper plants are still producing.  Actually, I haven't picked any of the Tabasco peppers yet.  I have harvested some of the hot lemon peppers and two habanero peppers.  I've been waiting for the rest of the habanero peppers to turn a deep orange, but it's slow going. :)
Habanero Peppers
This week, I made a great dish.  I made BBQ Tofu Cubes from VegWeb.com.  The tofu was absolutely fantastic!  I ate part of it the night I made it.  I put it on a high fiber (12 gr.) tomato basil tortilla with some romaine lettuce.  Wow!  I took the rest of it to work to have on another tortilla for lunch.  I definitely recommend this recipe if you like BBQ.
Later in the week, I had a meatloaf burger from The Best Veggie Burgers on the Planet by Joni Marie Newman. I made the burgers earlier this summer and threw a couple in my freezer.  I put some of my Bread and Butter Jalapenos on the burger and MAN OH MAN!  It was one good burger.  I think my Bread and Butter Jalapenos are a complete success.  Thank you, Darlene!!!  (My canning mentor!)  They are a bit spicy, but not too hot and oh so yummy!  I'll be making these every year.
I finally ventured over to the Homewood Farmer's Market yesterday in the POURING rain.  I'm so glad I did, too, as I found many delightful veggies.  I bought 4 pounds of tomatoes, 3 heads of garlic, a red onion, cauliflower, and some mushrooms.  I already had 2½ pounds of Roma tomatoes from my CSA box, but I needed a bit more to make some Bruschetta in a Jar. The link is to the basic recipe, but the directions I followed (via Darlene, of course) are a bit different.  Just before I made this, another poster in our Yahoo! canning group said that one of her jars broke in the hot water bath.  Darlene thought it was because she didn't use hot tomatoes, but packed the jars with room temperature tomatoes.  Needless to say, I followed Darlene's recipe.
Bruschetta in a Jar 

Makes about 7 half pint jars (8 ounces)


5 cloves garlic, finely chopped
1 cup dry white wine
1 cup white wine vinegar (I used red wine vinegar)
1/2 cup water
2 tbsp granulated sugar
2 tbsp dried basil  (I used about 1/4 cup of fresh basil, chopped)
2 tbsp dried oregano (I used 2 tbsp fresh oregano chopped, and 1 tbsp dried oregano)
2 tbsp balsamic vinegar
9 cups chopped cored plum tomatoes 


Combine all ingredients, except tomatoes, in a non reactive pan.  Bring to a boil.  Add tomatoes.  Bring to a boil and then simmer for 5 minutes.

Using a slotted spoon, pack tomatoes into hot jars leaving a generous 3/4 inch headspace. Ladle hot vinegar mixture into jar to cover tomatoes, leaving 1/2 inch headspace. Remove air bubbles and adjust headspace, if necessary, by adding hot liquid. Wipe rim. Center lid on jar. Screw band down tightly until resistance is met, then increase to fingertip tight.  Process 20 minutes in a BWB. 

I got exactly 7 half pint jars from my batch. 

So are you wondering what my stupid move was this week?  I inadvertently deleted my blog.  :::gasp:::  I was trying to consolidate a Google account, since I had to make one for my android phone.  I deleted an old account not realizing that it controlled my blog.  So, when I deleted my Google account, I deleted my blog.  I think I did that on Thursday, maybe Wednesday.  I discovered it yesterday.  Yes, it did send me into a panic, but luckily, I was able to restore both my account and my blog.  :::whew!!!:::  Needless to say, I'll be a bit more careful in the future.  :::shakin' mah head:::
Kobe, looking disgusted but tolerant
My oldest son loves to torment the big girls.  He picks up their 70 pound behinds, twirls them around, and then sets them back down.  I got pictures of their faces as proof that they do NOT enjoy this exercise.  HA!
Jordan, equally distressed, but also tolerant
Finally, I don't think I've posted many pictures of Skittles.  So, I'm posting one of her, too.  She was just groomed yesterday and thinks she is quite pretty.  Skits will be 13 on Halloween this year.  She's the matriarch of the brood. :)


Sunday, August 14, 2011

Sunday Cooking

I thought I'd show you the finished product for my Peach Butter.  It is excellent.  The blend of spices was perfect for the white peaches and made a lovely butter.  I've had it on bread and an English muffin so far.  It definitely is a repeat recipe.
My deck container garden is coming along nicely.  A ripe Hot Lemon Pepper is above, and below are a few of the Habanero Peppers, not quite ripe yet, but some are starting to turn a nice orange.
Below are my Big Boy tomatoes.  I wouldn't say I got the biggest crop off of the plant, but it is rewarding to eat something I've actually grown.
I've since harvested those tomatoes and have a few more growing.  It's not enough to even make 1 pint of tomatoes, but it's enough to add to a meal or salad.
I used the last of my garbanzo beans a couple of weeks ago.  Last week, I resorted to buying one can of garbanzo beans so I could have some in my salad.  Today, I cooked 3 cups of dry beans, making 6 to 7 cups of cooked beans.  As you can see, I spread them out in a single layer on a jelly roll pan and freeze them for 45 minutes before transferring them to a ziplock bag.  I love the flavor of freshly cooked garbanzo beans.  I use no seasonings in the pressure cooker when cooking them.  That gives me a lot of room for using them in different dishes.
Here is the last of Thursday's CSA box.  I still have to cook the gold beets, but that will be later in the week. I will fix the corn for tonight's supper. I found a recipe for Kohlrabi and Carrots fixed in a similar fashion to mashed potatoes.  I'm going to try that tonight as well.  And, I'll be making BBQ Tofu.  I found both recipes on VegWeb.com and they look very good.
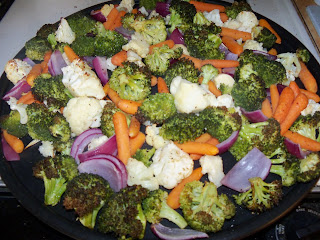
I roasted a (huge) bag of cauliflower, broccoli, and carrots (it took 2 pans to roast it all).  I added a red onion and half dozen or so of garlic cloves.  I'm making a creamy roasted soup.  I've made the soup before with cauliflower and sweet potatoes.
I cut 4 or 5 sprigs of fresh thyme from the plant on my deck, added a bay leaf, a quart of organic mushroom broth, 1 no-chicken bouillon cube, 2 1/4 cup water, and 3/4 cup of sauvignon blanc wine.  I let it simmer for 20 minutes or so, then I used an immersion blender on it to make it smooth and added 1 cup of unsweetened almond milk (at a mere 40 calories per cup).
I did a taste test.  Nope, the soup wasn't doing it for me.  It was missing something.  It was savory, but not quite the right flavor. Sooooo ... I added about a teaspoon of mild curry powder, maybe a tad more.  VOILA!  That was the flavor I was looking for.  I'm a curry lover and this soup will now become one of my favorites.  The only thing missing is some big toasted croutons or a slice of crusty bread to dunk in it.

It's been a heavy cooking day.  I started the day by making my son pancakes for breakfast. :)  But, Sunday is a good day to cook and make a few things that I can eat during the week.
Jordan on the stairs looking for trouble out of the front door.
The weather is beautiful today.  The sun is out and it's a very comfortable 73º outside.  The windows are open and the entire family is enjoying the day.  Kobe begged me to stay outside in the backyard with her for a bit today.  So, I weeded around my flowers and hosta plants while Kobe chilled.
Kobe chilling in the back yard.
This is what Summer is all about.

Sunday, August 7, 2011

Cooking and Canning

It's been a month since I blogged.  WOW!  And that month has gone by quickly.  I took a vacation in Wisconsin for a week and have been tending to my deck garden.  OK, that's not exactly true.  My oldest son has been tending to my deck garden.  And he has done an excellent job!  My hot lemon peppers are turning yellow, my habanero peppers are turning orange, my Big Boy tomatoes are ripening, and I harvested a bunch of jalapeno peppers and the lone yellow bell pepper that my plant produced.

While on vacation, I made stuffed peppers.  I'm not a stuffed pepper fan.  I don't ever make them at home.  But, I did on vacation.  They turned out quite tasty, too.  Although, I'm not going to start making them all of the time.  Here's what I did.

Stuffed Bell Peppers

4 good sized green (or whatever color you prefer) bell peppers that will stand up
1 tablespoon olive oil
1 medium onion, chopped
1 8oz. package of  baby bella mushrooms, chopped (can use sliced)
1 teaspoon Mrs. Dash Southwest Chipolte flavor
1 teaspoon Mrs. Dash Garlic and Herb flavor
1/2 teaspoon pepper
1/2 of a package of vegan crumbles
2 cups of your favorite marinara or other pasta sauce

Preheat oven to 350º F.

Slice tops (approximately 1/2") off of the bell peppers.  Chop up the tops of the bell peppers.  Put olive oil in a large skillet.  Warm and then add chopped bell pepper tops, onion, and mushrooms.  Saute until onions and peppers have softened and the mushrooms have released their water.  Add seasonings and vegan crumbles.  Saute until vegan crumbles are warm and have dried a bit.  Add marinara sauce; stir to blend.  Can top with shredded vegan cheese or Parmesan cheese.

Stuff each bell pepper and place on a lightly oiled cookie sheet or cake pan.  Bake for 35 to 40 minutes.
Besides making peppers, I had a serious craving for soup.  I had a package of Yves Veggie Chorizo  that I either needed to use or toss, so of course, I went looking to use.  I stumbled across Vegan Sausage and Kale Soup on Stacy Eats.  I actually had kale in the house as I've been getting it in my CSA boxes.  I didn't take the big stem out, which is one thing I would do if I use it for soup again.  Plus, I'd saute it longer so it was more tender.
The recipe is very simple and has a relatively short list of ingredients.  I used No-Chicken broth versus veggie broth and butter beans instead of Great Northern.  It was quite tasty and I ate it for a few days until the very last of it was gone.  I do confess to adding some fresh picante sauce to it and a couple of good shakes of my favorite taco sauce to kick up the spiciness.  It's a soup I'll make again, but next time, I'll probably use spinach.  I don't usually keep kale in the house.
The absolute BIGGEST pot I've ever owned.  It's HUGE!
Last weekend, I made Bread and Butter Jalapeno Pepper Slices and Patty Pan Squash pickles.  I've not made either of these before, so I'm be anxious to see how they turned out.  I say I'm anxious as the Bread and Butter Jalapeno Pepper Slices have to sit for a month before I can open them.  I'm not sure how long the Patty Pan Squash are supposed to sit, so I'm letting them sit for at least a couple of weeks.
I got the recipe for the Bread and Butter Jalapeno Pepper Slices from Darlene, the ULTIMATE canning person, in my humble opinion. Darlene is AH-MAZE-ZING!  :::smile:::  She can answer virtually any question about canning or dehydrating.  Here is Darlene's recipe for Bread and Butter Jalapenos.  If you like canning and dehydrating or want to start canning or dehydrating food, please join the Yahoo! Group, Food Preservation, Drying, Canning, and More.  Hands down, this is the friendliest group that I belong to.  The people there are completely supportive and helpful.
Bread and Butter Jalapenos
Yield: about 7 Pints
  
This makes a very tasty and spicy addition to almost any meal. For those that 
are daring substitute the jalapenos for habanera peppers but BEWARE these are 
HOT. Use gloves handling any peppers!!!

4 lbs jalapeno peppers
2 lbs onions
3 cups vinegar
2 cups sugar
2 Tbsp mustard seed
2 tsp turmeric
2 tsp celery seed
1 tsp ginger powder

Wash and cut jalapenos and onions into thin slices and cold pack into jars.

Place remaining ingredients in large saucepot and bring to a boil.

Pour hot mixture into jars, leaving 1/4 inch headspace. Remove air bubbles. 
Adjust headspace if needed by adding more hot mixture. Wipe rims. Adjust caps.

Process 10 minutes in boiling water bath.

NOTE: Best after letting sit for 1 month but can be used after 2 weeks.
While I have only made the jalapeno variety, I have a TON of habanero, tabasco, and hot lemon peppers starting to ripen on my deck.  I may try this with a combination of the three peppers.  That same Sunday, I threw some Roma tomatoes in the oven to slow roast at 200º overnight.  The recipe for Slow Oven-Roasted Roma Tomatoes stated they should cook 10 to 12 hours.  I left mine in about 11 hours and they were WAY overcooked.  :::sigh:::  I'll try it again, but I'll do it during the day so I can check on them.  I've also thought about just throwing them into the dehydrator instead of the oven.  That may work as well.
On Wednesday, I decided to make Blueberry Butter.  The recipe states it should take 6 hours or so to cook.  Well, MINE took a whopping 23 hours to cook.  I can't believe it took that long, but my crock pot is 40 years old and cooks at a very low temperature on the Low setting.  I only used about 3 1/4 cups of sugar and I doubled the spices.  I used an immersion blender to smooth out the butter just before I ladled it into half pint jars.
The Blueberry Butter turned out great.  It's thick and smooth and spreads like a dream.  It's a tad on the tart side, so it's not over-the-top sweet.  I'll make it again, only next time, I'll use the High setting on the crock pot to cut the cook time in half.

I discovered I like a vegetable I have hated since I was a kid.  That vegetable is beets.  OK, I can't say I like the red variety, as those are the ones I have hated since childhood, but I can say I have tried gold beets and I like those.  I got some in my CSA box on Thursday.  I scrubbed them, cut them in 1" chunks, and then tossed them with 1 tablespoon of extra virgin olive oil, and a sprinkle of salt and pepper.  I roasted them at 350º for about an hour.  They taste a little like sweet corn to me.  It's an odd flavor and one I don't quite trust, but they are really quite good.  I'll be ordering them again this week.  My CSA also offers red beets, but I'm just not ready to try those yet ... maybe one day.
Soooo ... that brings us to today.  Today, I am making Peach Butter.  I am loosely following a recipe from the Ball Blue Book Guide to Preserving and a recipe for preserves posted by Darlene in the Yahoo! Group.  I took the skin off of about 3 1/2 pounds of peaches (submerge them in boiling water for 30 seconds, then in ice water for 2 minutes and the skins slip off).  Then, I chopped the peaches and threw them in my crock pot.  I added 3 tablespoons of lemon juice, 2 cups of sugar, 1 heaping teaspoon of cinnamon, 1/2 teaspoon (or a bit more) of freshly grated nutmeg, and 2 teaspoons of homemade vanilla.  It's cooking on HIGH heat :::chuckle::: and I'm hoping it will be done sometime TODAY!  :)  I'll let you know on that.
Finally, I am roasting some Zuma Grape Tomatoes.  These grape tomatoes are orange in color and very tasty.  They are sweet, a touch sweeter than red, and I love eating them like cherries.  However, there were way too many for me to eat before they spoiled.  So, I decided to roast them at 275º for 2 hours.  I washed them, cut them in half, and tossed them with 1 tablespoon of olive oil, and a sprinkle of both fine sea salt and pepper.  Once done, I'll throw them into a ziplock baggie and put them in the freezer.  I'm going to use them for pasta dishes, pizza, garlic bread, etc.  Nothing better than having slow roasted tomatoes ready for consumption.
I bought the girls a new bed last weekend.  I'm leaving you with a picture of Kobe thoroughly enjoying the new bed.  All three of my dogs sleep in it on a regular basis.  Nice to see that they all like it so much.  Hope you are having a great summer!

Wednesday, July 6, 2011

Stuffed Mushrooms

I had a few mushrooms left from my visit to the Farmer's Market on Sunday.  I had spied a recipe for Stuffed Mushrooms on the Seitanic Vegan Heathen blog.  I thought it looked pretty good and pretty simple.  I decided that tonight, I'd be making these mushrooms.
I removed the stems and chopped them up and added them to the TVP mixture.  I added more spice than was in the recipe on Seitanic Vegan Heathen's blog, so I'm going to list what I did.  Mine have a bit of ZIP from the spices.
Here's what I put in mine:

3/4 cup TVP
3/4 cup boiling water
2 teaspoons or so of Pasta Sprinkle (Penzey's - just a blend of oregano, basil, thyme, and garlic)
1 teaspoon or so of Penzey's dried garlic cubes
1 tablespoon minced dry onion
2 2/3 tablespoons tomato paste
1 tablespoon nutritional yeast
minced stems from mushrooms
couple of shakes of Liquid smoke
couple of shakes of smoked paprika
couple of shakes of pepper
1 shake of salt

I let the stuffing mixture sit for 10 or 15 minutes so the TVP was fully re-hydrated before I stuffed the mushrooms.  I put them in a ceramic baking dish and covered it with foil.  They baked for 20 minutes.  Then I removed them from the oven and put some vegan nozzarella on it.  I like Follow Your Heart, but many people like Daiya.  I don't care for Daiya at all, so really, use what you like best.

Overall, these were good.  I think the mushrooms dried out too much.  I'm not sure why that was.  I did end up putting about 1/4 cup of veggie broth in the dish and cooking them a bit longer to see if that helped.  It did.  If I make any kind of stuffed mushrooms again, I'll roast the mushrooms first before adding the stuffing, which really just needs to be heated through.  Personally, stuffed mushrooms aren't my favorite way to eat mushrooms, but it is good for a change.
Kobe Bean
Here's my girl, Kobe Bean.  She's playing it cool, trying to look disinterested even though she's laying smack in the middle of the floor right in my way.  I suspect she's waiting for a tasty morsel to drop.  No such luck tonight!

Monday, July 4, 2011

BBQ Seitan Ribz and Mushroom Chicken Burgers

Today, I made two more BBQ items.  I made Susan Voisin's Barbecued Seitan Ribz from her FatFree Vegan Kitchen blog.  I also made another burger from Joni Marie Newman's cookbook, The Best Veggie Burgers on the Planet.  Today, I made Mushroom Chicken Burgers on page 96.
The ribz were definitely the easier of the two to make.  Basically, I mixed the ingredients together, kneaded it for a minute and a half to two minutes, and then baked it.  After that, it was smothered in BBQ sauce and put on the grill.  You can see one of the Mushroom Chicken Burgers next to the "ribz" wrapped in foil.
The Mushroom Chicken Burgers were a multi-phase item.  I only had whole flax seeds, so the first order of business was to grind them in my food processor attachment that came with my immersion blender.  I don't know why, but I hate grinding flax seeds.  It's really unreasonable as it's so incredibly easy to grind them.  I ended up grinding all of the rest of the flax seeds I have and put the majority of them into the freezer.

I had to reconstitute the TVP in veggie broth, chop mushrooms (baby bella mushrooms that I got at the Farmer's Marker yesterday) and garlic, and then saute the mixture.  I crumbled the tempeh (which I had to use before next week sometime) and added it to the mushroom mix and sauted it for an additional 5 minutes, then added all of the ingredients together.  I will say, I did NOT like the way these came together.  I will also say that my cooking method is probably to blame in part.

I didn't want to add a bunch of oil to the mushrooms, garlic, and then tempeh when it was added.  I initially started with maybe 1 tablespoon to 1½ tablespoons of olive oil to saute the mushrooms.  But when I added the garlic, I didn't want to use more oil, so I added a splash of veggie broth.  Once I added the tempeh, I added more broth.  I don't think I let it cook long enough to cook off all of the broth.  I should have sauteed it a couple of minutes longer to dry it out.

When adding all of the ingredients together, it wouldn't come together.  The dough was too moist.  I kneaded it for a few minutes (good grief, it was like glue on my fingers), but it still didn't want to come together.  I ended up adding 1/4 cup of wheat gluten.  I tried 1/8 cup first, but that did nothing.  So, I added another 1/8 cup.  It still didn't seem like it did much, but I figured if I added more, it would change the integrity of the burgers.  SO, I used a paper towel to coat my trusty tupperware hamburger press with olive oil, grabbed a spoon, and began making burgers.
Surprisingly, the burgers held together OK (with minimal handling) once I put them in the press and formed the burger.  I wrapped each burger loosely in foil so I could steam them on the Weber grill.  The burgers really didn't stick to the hamburger press, which I thought was a good sign.

The Mushroom Chicken Burgers are a moister burger.  They did well in the foil method on the grill.  These burgers would not hold up being put directly on the grill, in my opinion.  I enjoyed the flavor, which is definitely on the "chicken" side, but not really like chicken.  I had mine with mustard.
Overall, my grilling experiences with vegan burgers and ribz was a good one.  I will make both of the burgers from this weekend again.  I'll definitely make the ribz again.  It was nice to cook my food on the grill along with my sons' food so we could all have BBQ for the holiday weekend.

Sunday, July 3, 2011

Bacon Cheeseburgers and Roasted Potatoes

It's the 4th of July weekend.  I cooked out on the grill yesterday.  I made some food for my sons (courtesy of my youngest leaving the door ajar to my deep freezer), some food only for me, and potatoes for both of us.  I've been searching my vegan cookbooks for two weeks looking at all of the burger recipes. I wanted to make a new type of burgers. I finally chose Bacon Cheeseburgers on page 89 of The Best Veggie Burgers on the Planet, and BOY-OH-BOY, I'm glad I did.  Thanks to Joni for putting the recipe on her blog, so I can share the link to it with all of you. :)
The first step I took was to make Imitation Bacon Bits on page 185.  I've not made imitation bacon bits before, and the recipe for this was very easy.  I just boiled some water and Liquid Smoke (I used half hickory flavor and have mesquite flavor), marinated TVP in it for 10 minutes, and then cooked the TVP until it dried out.  The recipe called for red food coloring, which I didn't have, but I didn't miss that.  I was a little apprehensive on how the finished product would taste, but it was good.  It doesn't taste quite like bacon, but it does have a "smoky" flavor that is vaguely reminiscent of bacon.  I think it is a decent substitute.
I compiled all of the ingredients for the burgers.  If it looks like a lot, it is.  I made a double batch of burgers.  My intention was to freeze a good number of burgers so I can take some to my brother and sis-in-law later this month when I see them at a family gathering.  (I will be making another type of burger in the next week so I can take them a couple of different types of burgers.)
I have to say, I didn't know how well the burger dough would come together with the peanut butter, maple syrup, and BBQ sauce in it, given that I had to use my hands to mix it up.  The recipe said to knead it for 5 minutes.  I can't stand that part and I'm ALWAYS watching the clock for the time to be over, and that's when I only have to knead for 3 minutes.  When I made these, I figured since I had to knead a couple of extra minutes, I'd set the timer when I began and not look at the clock.  The time went by quicker than I thought it would.  However, one of these times, I'm going to get my stand mixer out and the dough hooks and see if that works as well as hand mixing.
I always use my trusty Tupperware hamburger press to make my burgers.  They come out so uniformly shaped.  Note the bottom right burger looks thicker than some of the other burgers.  That's because the recipe states that it makes only 4 burgers, so I thought I'd get 8 burgers.  I divided the dough in half and then divided one of the halves in fourths.  I quickly realized that the burgers were going to be GINORMOUS.  So, I cut some of the burger away from the original three that I made and made smaller burgers.  The recipe will easily make 6 burgers (about the size of a quarter pounder).  I ended up making 10 burgers, but easily, I could have made a dozen with the double batch.

As for the taste, you ask?  These burgers have a BBQ flavor that is mellowed a bit by the nutritional yeast.  I absolutely love these burgers.  They held up exceptionally well on the Weber grill.  I wasn't sure they would because they weren't steamed or cooked in any manner before I slapped them on the grill.  I coated the burgers with BBQ sauce and let them sit on the grill for another couple of minutes before removing them.  I made 3 burgers and froze the remaining 7 burgers.  I will DEFINITELY be making these again!  They ROCKED!
As the side, I cut up four Yukon gold potatoes in 1" chunks.  I drizzled 2 tablespoons of olive oil over the potatoes and added 1 teaspoon of Northwoods seasoning (Penzey's) and 1 teaspoon of garlic powder.  I also minced 1 sprig of fresh rosemary and 3 sprigs of fresh thyme (cut a minute beforehand from the plants on my deck) and added that to the potatoes.  I sealed the potatoes, herbs, and spices in tinfoil, and put it on the grill to cook for about 45 minutes.  It made a very tasty side dish.

Sunday, June 12, 2011

Herbed Breakfast Sausage Patties

I bought the Vegan Diner: Classic Comfort Food for the Body & Soul.  I received it a couple of weeks ago, but haven't made anything out of it.  Today, I decided to make Herbed Breakfast Sausage Patties.  I don't know why I wanted to make it as I've never been a big breakfast sausage fan, but I was looking for a tofu breakfast scramble and it just sounded good when I ran across the recipe.

This sausage dough was incredibly easy to make.  I loved the fact that all but 3 ingredients were whisked together. Then I only had to whisk the water, olive oil, and soy sauce (I used low sodium Tamari) and just stir it into the dry ingredients with a fork.
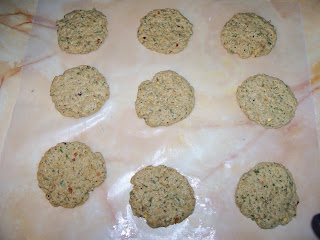
I used a coffee scoop to measure out the dough into 1/8 cup increments.  I don't have a small burger press, so I just used my hand to flatten the dough mounds into patties.  They came out fine.  I think part of the charm of breakfast sausage patties is that they aren't perfect patties when made at home.
I used my Wolfgang Puck Rice Cooker with the 3 stainless steel steamer trays to steam the patties.  I steamed the patties in the top steamer tray for 10 more minutes after removing the patties in the lower trays just to make sure they were done.  This rice cooker was an excellent investment and relatively cheap.  I only paid $50 for the entire set.  At the time of purchase, I had no idea I would stop eating meat and would use it repeatedly to make steaming seitan a snap!
So, the recipe says to let the sausage patties cool completely before removing them from the foil.  Then, the patties should be refrigerated, preferably overnight, before pan frying and consuming.  I removed the patties from the steaming trays and put them on a cookie rack to cool.
OK, did you think that I would make these on a Sunday morning and follow the directions exactly?  Ummm ... NO! :)  Hey, it was Sunday morning.  What better time to eat breakfast sausage????
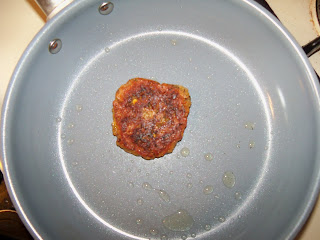
I threw one into my trusty skillet and browned it to perfection.  One thing I did learn from browning these is that it would have been better if I had used a flat surface, instead of my hand, when forming the patties.  While the bottom of the patties is flat, the tops are not making it brown unevenly on one side.  Of course, that did NOT affect the taste.
Herbed Breakfast Sausage with Pancakes and Earth Balance
I asked my oldest son if he wanted a vegan sausage patty.  His response was exactly one word, "YUCK!"  However, he did say that the sausage patties smell like regular sausage patties and he didn't know how that was possible.  :::chuckle:::  My response, you ask?  I replied, "That's because I'm a great cook!"  He agreed.

This recipe actually yielded 15 sausages for me.  I think using the coffee measuring cup helped with that.  The sage flavor is very strong.  I thought with adding 1/2 teaspoon of red pepper flakes, the sausages might be too spicy, but they aren't spicy at all.  It's been years since I had breakfast sausage, but from my memory, these taste close.  I'll definitely be freezing the dozen I have left for future use and I'll definitely make this recipe again.  It's easy, quick, and yields great results!

A post blog entry note:  I did a nutritional analysis on these patties based on the 15 that I got from the recipe.  The results are per patty:  61 calories, 13 from fat; 1g fat; no saturated or trans fats; no cholesterol; 226mg sodium; 5g carbohydrate, 1g fiber; 7g protein.