Tuesday, September 28, 2010

Linguine with Mushrooms, Onions, Heirloom Tomato, and Alfredo Sauce

Tonight's dinner was sauteed mushrooms, onion, and heirloom tomato in the Alfredo sauce recipe from the Quick and Easy Vegan Comfort Foods cookbook.  The cookbook has two Alfredo sauce recipes.  I used the tofu based recipe as I had a package of silken tofu I had to use up.  I didn't want plain pasta and Alfredo sauce, so I decided to use a few things I had on hand.
My first step was to make the Alfredo sauce, which was quick and easy in the blender.  I wanted it to be ready and waiting to put into the pan after the veggies had sauteed.
I chopped an orange heirloom tomato that I had on hand.  It was very flavorful.  I could have eaten the entire thing off of the cutting board.  I resisted.  :::smile:::
Next, I sauteed the mushrooms and chopped onion until they were soft and full of flavor.  I added the tomato to the pan and sauteed it for a minute or two more.  I didn't saute the tomato too long as I wanted it to retain some firmness.  I poured in the Alfredo sauce and let it simmer a couple of minutes to warm the sauce.
After the sauce had warmed, I added the cooked linguine to the pan.  I let it simmer for just another minute and then, I dished up a bowl and enjoyed it.
All in all, I liked the Alfredo Sauce dish.  It's rich, so it's not something I'll eat frequently, but it would be nice for a holiday or special occasion with a nice slice of garlic bread (unfortunately, I didn't have any) and a nice glass of wine.


Sunday, September 26, 2010

Slow Cooker Enchilada Chili with Absolutely Delicious Holiday Cornbread

It's really feeling like fall in Chicago.  We had a mostly gray, cool weekend.  Temperatures hovered in the upper 50's on Saturday afternoon and were in the lower 60's today.  I ate the last of my chili from the freezer months ago.  It was time to put some more in the crock pot.  
I've enjoyed the chili that I made before.  Actually, it was an enchilada casserole recipe for the crock pot from the FatFree Vegan Kitchen website.  It's very good, but I wanted a different flair for my chili.  I made up a recipe as I went along and it turned out quite good.  I topped my bowl of chili with shredded Follow Your Heart cheddar cheese, Tofutti Better than Sour Cream, and a splash of spicy taco sauce.  I usually throw a few jalapeno slices on my chili, too, but I didn't want to take the time to search for my unopened jar.
I also made Absolutely Delicious Holiday Cornbread from vegweb.com.  I made a few changes to the recipe. It calls for ¼ cup of natural sugar (Florida crystals), and I didn't have that.  So, I used ¼ cup of light brown sugar instead.  I don't buy soy milk, so I used 1 cup of coconut milk instead.  I also used a deep muffin tin, sprayed it with olive oil baking spray, and only made 6 muffins.  They were not huge muffins, so had I made 12, they definitely would have been small.  I didn't have any canned corn, so I threw in about a cup and a half of frozen corn that I had run under water to help thaw.  I cooked them for about 25 minutes and although they look very light in the above picture, they were cooked perfectly and turned out absolutely delicious!
 Slow Cooker Enchilada Chili

1 28 oz. can diced tomatoes
1 24 oz. jar of chunky salsa 
1 6 oz. can of tomato paste
2 15 oz. cans of black beans, rinsed and drained
1 15 oz. can of corn, drained, or 1½ cups of frozen corn, rinsed
1 4 oz. can of green chilies
1 10 oz. can of Rotel tomatoes with green chilies
2 cloves garlic, minced
1 yellow onion, diced
1 cup TVP
1½ tablespoon ground cumin
1½ tablespoon chili powder
2 teaspoons hot sauce

Garnishes
crushed taco shells or tortilla chips
shredded Follow Your Heart or Daiya cheddar cheese
Tofutti Better than Sour Cream
Taco Sauce
Jalapeno slices

Combine all ingredients in a slow cooker.  Cook on low 6 to 8 hours (or cook on high for 2 hours and low for 4 hours).  Serve hot with garnishes of your choice.  May be frozen.  Thaw and reheat.
Tonight's dinner was very good.  I really liked the addition of TVP, as it really gave the chili a "meaty" feel.  It looks like there is ground beef in the chili.  My oldest son asked me why I added meat to the chili and if I was cheating.  That made me chuckle. He won't eat it, though, as he doesn't like chili of any kind.  My younger son will be digging into it.  He's already snagged a corn muffin.  I had to stop him so I could take a picture of the cooked cornbread without any missing.  As soon as I snapped the photo, he grabbed one.  Kobe, my black lab, was waiting patiently in the middle of the kitchen floor (in my way, of course), in case I decided to drop any of the chili or corn muffins.  Unfortunately for her, I did not.  Chili is definitely NOT an acceptable food for a dog and I didn't make enough corn muffins to waste any.  :::smile:::

This chili freezes and reheats very well.  I will be freezing a significant portion of the chili for future enjoyment on nights that I just need a quick dinner. It's definitely a repeat dinner!

Naked Vegan Waffles with Homemade Pear Syrup


Sunday morning is big breakfast morning.  After two consecutive weeks of pancakes, today I made waffles.  I chose Naked Vegan Waffles as my new recipe to try.  As you can see from the picture above, the finished waffles look perfect.  They didn't stick to the waffle iron and they were the perfect "chewy" waffle that my sons love.  They also were quite tasty.  The combination of ingredients produced a perfect, plain waffle that didn't have the metallic taste that I tasted in the pancakes.
The recipe called for soy milk, but I don't stock that (ever), so I used coconut milk.  Basically, I used that over the almond milk I had in the fridge only because I wanted to use it up.  I suspect almond milk would have been just as good, if not better, as I feel it adds a twinge of sweetness.  I'll use that next time.  I may also add a bit of vanilla.  The recipe does not call for any vanilla at all, and generally, I like that in my waffles and pancakes.  The batter was a little thick at first, so I added another splash of coconut milk.  
I ladled the batter into the waffle iron after spraying both sides of the waffle plates with olive oil.  I have a double decker waffle iron, so I can make two waffles at the same time, which is very nice considering there are 3 of us in the hour.  The picture above was taken right after the waffle iron beeped that the waffle was done.  I didn't have any problem at all with sticking, and the waffle was perfect.
This was the first waffle, where I didn't carry the batter all the way through to the sides like I should have.  However, it didn't affect the taste.  (Like the Batman plate?  It's a leftover from when my sons were small. :)

This is an excellent, basic waffle recipe.  I couldn't tell any difference between this waffle and those I have made with eggs.  I topped my waffle with some vegan light margarine and some homemade pear syrup that I had made and canned at the end of August.  It made a very tasty breakfast.

Saturday, September 25, 2010

Classic Marinara Pizza

OK, so I forgot to take pictures of my pizza creation yesterday.  :::sigh:::  Although there are no pictures, the pizza turned out great.  

I decided since I am making pizza each week, I should invest in a pizza stone.  I saw one at Big Lots! for $10 a couple of weeks ago when I was searching for canning jars.  Did I pick it up then?  Of course not.  And of course, when I went back to Big Lots! yesterday, they were all gone.  One of the clerks gave me a tip that I should check at another Big Lots! store about 10 minutes away.  So, I picked up my son from school and made him go with me.  Luck was with us and that store had about 6 to 8 pizza stones, so I bought one and brought it home to use that night.
 
I must have read a dozen websites about how to use a pizza stone, as I have never used one before.  I realized after I was home with the pizza stone that I should have looked for a pizza peel, too.  However, I have a couple of cookie sheets that have a lip on one end only.  They easily allowed me to hold onto the sheet and slide the pizza onto the stone in the oven.  As you can see, my pizza stone has been used.  I scraped all of the "bits" off of it, along with the excess cornmeal.  Most websites advise to just leave the rest on the stone versus rinsing it off as it flavors the next pizza.  Also, I have a dilemma about storing it.  It is rather big.  Many people just leave it in their oven and cook on top of it.  I'm not sure that I will do that.  I'll be trying to find a suitable storage spot for it.

I made the pizza dough in my bread maker.  It turned out pretty good, but I think because I'm such a novice at stretching dough, the dough was handled too much and became a little tough. I used ultragrain flour versus white flour to give the dough more fiber.  I've read in several recipes to make the dough a day or so ahead as the crust will have more flavor and be much better.  I will be making dough on Wednesday and then just storing it in the fridge until Friday for the pizza.  I will probably just make one big pizza with a little thicker crust next time, versus making two smaller (10" or 12") pizzas with thinner crusts.  I also think the more I cook on the pizza stone, the better I will become as the pizzas cooked SO QUICKLY that I was really surprised and probably should have taken them out a couple of minutes earlier than I did.  I'm sure this next Friday, my sons will want pizza from a pizzeria, so I'll only be cooking for myself.  It will be a good time for more experimenting.

I made my vegan pizza a half-and-half pizza.  The toppings on one side of my pizza were just sauce and cheese.  The toppings on the other side were sliced mushrooms and chopped black olives, and of course sauce and cheese.  I used Follow Your Heart mozzarella and cheddar flavored cheeses.  I used mostly mozzarella with just a sprinkling of the cheddar over the pizza.  I made my sons a traditional pizza using SAD cheese.  

The pizza was great. I really enjoyed it.  My sons' father tried a piece of cheese pizza from my pizza.  He does not eat vegan at all and actually turns his nose up at it.  He thought he was eating SAD cheese pizza.  Both of my sons had a piece of the vegan cheese pizza, and they both liked it.  My older son told me my pizza tasted better than his pizza, and he is a cheese pizza connoisseur, so that was high praise coming from him.  In fact, today he is STILL complaining that my pizza was better than his.  :::chuckle:::

I'll continue to try a different pizza recipe each Friday night.  I have to admit, I liked the Whole Foods whole grain pizza dough a LOT.  I haven't been able to find a recipe that mimics it yet.  I'll keep looking, but I may just end up buying more ready-made dough if I can't find something comparable.  Also, I'm going to chop the veggies in advance, too, so I'm ready to put the entire pizza together when I hit the door after work versus having a lot of work ahead of me before I can put it together.  This coming week is my late week, so I won't get home until 6 PM or 6:30 PM and I don't want to have to do an hour of preparation before I can bake the pie.  I'm going to have this down to a science before long.  Yeah, I'm into convenience.  heh! :)

Tuesday, September 21, 2010

Tomato and Mushroom Calzone

Tonight, I made calzones for dinner.  My sons had non-vegan calzones, but mine was totally vegan.  I used pre-made whole grain pizza dough from Whole Foods and divided it into four portions.  I made my sons each a calzone and then made an extra one with just pasta sauce, herbs, and mixed cheeses for them for dinner.  
For my calzone, I diced a tomato and some mushrooms.  I spread some tomato, basil, and garlic sauce on the dough.  I sprinkled some vegan Parmesan on the sauce.  Next, I added the diced tomato and mushrooms.  I sprinkled some oregano and basil on top of the veggies.  Finally, I shredded some Follow Your Heart mozzarella on top of the veggies and herbs.  I baked it at 400º for 10 minutes, then turned the calzone around on the pan to make sure it wasn't sticking, and baked it another 10 minutes.  It was a light, fresh tasting calzone.  It wasn't overloaded with cheese, fat, or calories.  

Calzones are not something I make on a regular basis, but they were a nice change of pace.  The preparation takes a bit of time, but once the calzones are put together, it's a quick 20 minutes to chow time.  This was a nice early week dinner.

Sunday, September 19, 2010

No Fail Buttermilk Pancakes

Today was my second attempt at making vegan pancakes.  This time, I used the recipe for No Fail "Buttermilk" Pancakes from the Just the Food blog.  These were a HUGE improvement from last week's attempt.
The pancakes were definitely lighter and cooked to a golden brown. There was just something about the flavor that didn't taste right.  There were a couple of things that I did differently that could have made a difference.  
First, instead of vanilla soy milk, I used original coconut milk (from a carton, not a can).  I added a tablespoon of vanilla to try to compensate for not having vanilla flavored milk, but I don't think that would have made a huge difference.  Perhaps it would have been better if I had used the almond milk I have.  Almond milk is my favorite, I just wanted to use up the coconut milk I had.  Second, I only had Ener-G Egg Replacer and quite frankly, I've never used it before so I don't know if it has a "taste."  There was much less baking powder in the pancakes than last week, so that was good, but there was still a metallic type of taste that I couldn't identify.  It was a new taste to me.
The cakes cooked up nicely.  I did try to turn one too soon, which made it stick slightly.  But after that first attempt, I let the pancakes bubble up pretty well before turning and there was no more sticking problems.  I just flipped that undercooked one again to let it brown a bit more and it was perfect.
The end result was good overall.  I like the recipe.  I just need to figure out why it had that metallic taste.  I don't usually buy soy milk, but I will buy some vanilla soy milk to keep on hand for baking and see if that makes a difference.  I'll also try another egg replacer.

Next week, I'll take a break from pancakes.  There's actually a recipe that I want to try in the American Vegan Kitchen cookbook called Any Day French Toast with Sweet Spread.  I've also read great reviews about the Sweet and Crunchy French Toast in the same cookbook.  Still on my list is the Sweet Potato Waffles recipe in Vegan Comfort Foods.  My son's like to mix it up, so I will next week. 

Saturday, September 18, 2010

All-American Incrediburgers

It's Saturday.  I typically like to cook more on the weekends.  This weekend is no exception. I've been wanting to try the All-American Incrediburgers recipe in the American Vegan Kitchen cookbook by Tamasin Noyes for a while now.  I have all of the ingredients needed in my kitchen.  In fact, the recipe pretty much just takes staple items found in any vegan cook's kitchen.  However, the burgers have to steam for one hour and then cool in the fridge for an hour before grilling.  So, I knew it would take some time to make these.  I was determined they would be my Saturday project.
The burgers were very easy to put together.  The hardest part was timing myself so I kneaded them a full 4 minutes.  I'll admit, my hands were tired kneading at about the 3 minute mark, but I kneaded them a full 4 minutes.  I used an old Tupperware hamburger mold to make the burgers.  That way, my burgers will all be uniform in size and shape (hopefully!).  I created a loose foil packet around each one.
The next step was to steam the burgers for an hour.  OK, I don't know why I thought this, but I thought I'd be able to steam all 6 burgers in my steamer basket for my 3 quart saucepan.  WRONG!  So, I went to Plan B.  I bought this rice cooker with 3 steamer baskets in July 2009, 6 months before I had even thought about changing my eating lifestyle and a full year before I started using vegan recipes.  It was still in the box as I had never used it.  How glad was I that I had it?!?!?  It has 3 steamer baskets.  I know this will become one of my much used appliances.  I have been using a rice cooker with a single steamer insert to make rice and steam veggies at the same time, but now that I'm making my own burgers, etc. I will need more steamer baskets and this will definitely fit the bill.
An hour later, the burgers have finished steaming.  Out of the steamer they came and I put them on a plate.  The next step is to refrigerate the burgers for an hour (at least) to let them cool.  THEN, they will be ready for the grill.  It's rainy here today. I can't decide whether to BBQ them on the Weber or use the indoor grill.  I guess when the time is closer, I'll make that call. 

In the meantime, I need to go to the grocery store and pick up some Hawaiian Bread sandwich rolls, which are basically hamburger buns.  Yes, I know they are not the most nutrient dense buns that could be used, but my sons absolutely love them.  I'll probably pick up a package of multi-grain buns for myself.  After I return from the store, I'll start out side dish.  I will be making Crash Hot Potatoes instead of the usual.  My sons usually ask for Tator Tots, French fries, or mac 'n cheese.  However, I want something a bit more nutritious and flavorful. 
So, I decided to cook the burgers out on the Weber.  It's still gray and cloudy, but I would like the full flavor experience. After starting the charcoal, I smashed the potatoes.  
I went out and got some fresh chives off of my deck.  Years ago, probably more than a decade ago, I bought a chive plant.  That thing is indestructible.  I brushed the potatoes with some olive oil and sprinkled them with freshly cut chives. The potatoes were ready to pop into the oven for 20 to 25 minutes.

I got the burgers out and brushed one side with olive oil and popped them on the grill for 5 minutes before brushing the other side with olive oil and turning them over.  After 10 minutes on the grill, they were looking quite tasty.
Just to give myself the most authentic burger experience I could, I put a slice of vegan cheese on one of the burgers and put it back on the grill for about another minute.
About that time, the potatoes were ready to take out of the oven.  They looked great, too!
My Saturday evening dinner, which is a casual affair, actually took quite a bit of planning and preparation as I fixed two multi-stage dishes. BUT it was WELL worth the effort and time.  This is a repeat meal for sure.  AND, I have burgers left for another meal this week and to stick in the freezer for a night that I don't feel like cooking.  What could be better than a BBQ burger?  YUM!
I highly recommend the American Vegan Kitchen cookbook.  It has some fabulous recipes in it, all family friendly.  My son wants me to fix the NY Cheesecake out of the cookbook and there is a coffee cake recipe that I simply must try.  Plus, I will be making the Fork-and-Knife Reuben.  So many recipes, endless time...what a nice hobby for my fall and winter.

Friday, September 17, 2010

Beachy Green Pesto Pizza

It's Friday.  The traditional pizza night at our house.  The boys rotate different restaurants to provide the pizza, but it's a small, elite list.  Although the pizza was delicious, I don't eat it any longer because of the cheese.  Last Friday, I ordered a veggie pizza without cheese and added a sprinkling of Daiya Mozzarella to it.  That did not work for me.  I know MANY people eating vegan rave about Daiya cheese, but I am not impressed with it.  I don't care for the smell and I don't care for the taste.  It has to be on some really strong flavored food to mask that taste for me, and if the food has its own strong and unique flavor, why do I need cheese on it?  So, I decided that I simply had to do something different for my pizza fix tonight.
I went searching for vegan pizza recipes.  There are many.  I finally settled on one for Beachy Green Pesto Pizza.  It had a different topping that the traditional red sauce and gave me an alternative vegan cheese to try; Follow Your Heart.  I found Follow Your Heart at Whole Foods.  There were four different varieties.  I settled on the mozzarella and cheddar flavors, although for this pizza, I am using only the mozzarella.  A plus in the recipe, was the hint that Whole Foods sells pre-made multi-grain pizza dough.  I found it by going to the deli and asking if the pizza station (Chicago Pizza something) sold dough.  They did and I grabbed enough for two pies.  I'm only using one tonight and will use the other one to try the Vegan Teese Calzone recipe I found while researching.
I made the pesto and rolled out the dough.  Once that was done, I spread a tablespoon of olive oil on the dough and let it rise for about 10 minutes.  Then, I started my assembly.
I spread the pesto over the crust evenly.  The Follow Your Heart cheese was in a block, so I grated a small amount over the pizza and then sprinkled some pine nuts on it.
I drizzled a little more olive oil over the pizza (about a teaspoon and a half) and then baked it for about 17 minutes.  The recipe called for a personal pan pizza, but I made a whole pie, so it needed a few more minutes.  I broiled it only for about a minute to a minute and a half and then pulled it out.  That was more than enough for the cheese to get bubbly.
This is probably the spiciest pizza that I've ever eaten, hands down.  I thought when I was adding the teaspoon of red pepper flakes to the pesto that it would be spicy, but this is burn-your-lips spicy!  I didn't realize that it would have this much of a punch.  I love spicy foods, and this pizza is no exception.  It just surprised me.  I'm the only one who will eat this in my house, so I'll have plenty of leftovers.  I'm going to freeze the individual pieces so I can pull a couple out for lunch or dinner when I don't feel like cooking.

The pizza dough from Whole Foods rocks!  It's chewier than white pizza dough, of course, but it has a good flavor.  I will be using this again.  While my goal is to make my own dough (set it up in my bread machine before I go to work so it's made and ready to use when I get home), it's nice to know that there is a great alternative.  It was $2.49 for enough dough for one pizza.  I only made a 12" pie, but there was enough dough to make a bigger pizza with a crust that is more like a traditional thin crust.  I highly recommend it.

How did I like the Follow Your Heart mozzarella cheese, you ask?  It was GREAT.  For my taste buds, there is no comparison, taste-wise, with Daiya.  It tastes more like cow's milk made mozzarella, and as you can see in my picture, it melted nicely.  In fact, I'll be using it in the calzones on Sunday.  I've already told my sons that's what we are having for dinner and to start thinking about what they want to fill their calzone.  I will make their calzones just a bit healthier than they would have been otherwise and they will not notice the difference.  I'll be buying more of the Follow Your Heart mozzarella flavor.  Now, I just need to try some of the cheddar flavor.  If it's good, I'll branch out to the Monterey Jack and nacho flavors.

SO, my pizza experiments have begun.  Tonight's pizza is SO much better than the restaurant veggie pizza with vegan cheese added at home.  There is absolutely no comparison.  I'll keep you posted on my Friday night pizza masterpieces!

Monday, September 13, 2010

Barley and Bowtie Pilaf with Figs, Lemon, and Thyme

I got this recipe in a Yahoo! vegetarian group when I was trying to figure out what to do with the figs I bought.  I ended up eating them all raw ... delish!  I bought some more figs over the weekend and wanted to do something different with them.  I settled on this recipe, mostly because I had nearly everything in my pantry. The recipe was posted by Maureen, but credits Chupa Babi for the original file.   
The recipe started with cooking chopped onion in olive oil until it was golden colored.  Then the pearl barley was added and cooked for two minutes to toast it.  Next the broth was added, the pan was covered, and the barley was simmered for 35 minutes.
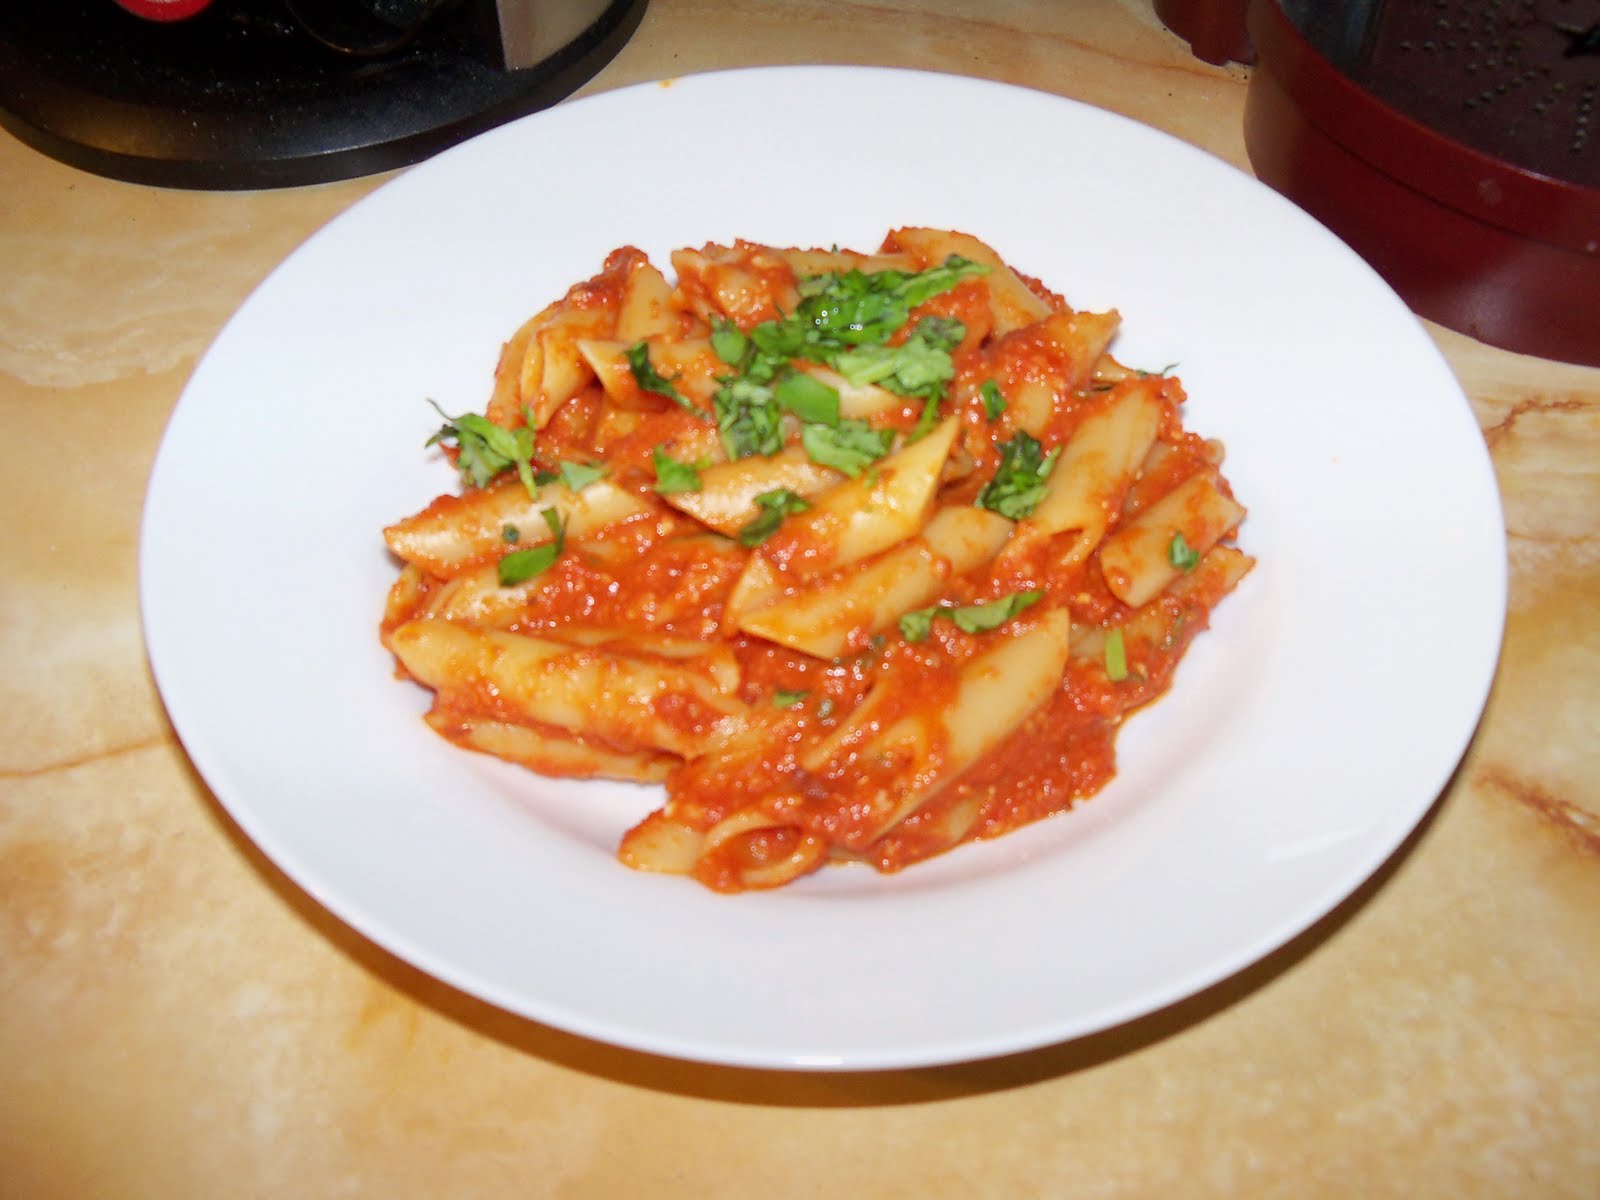
Meanwhile, the pasta was cooked according to the package directions.  I didn't have bowtie pasta, but I did have mini penne pasta, so I used that.  Once the barley simmered, the figs were added and it was cooked for 5 more minutes.  I must admit, I had to add broth to the barley mixture at least three times.  Once while it was cooking and had 15 minutes left, once when I added the figs, and then again before I added the spices and pasta.  The directions stated to drain the pasta, put it in a bowl, and add the spices to the pasta before adding the barley mixture.  I didn't have fresh spices, so I added the dried spices to the fig mixture in hopes that the flavors would meld better.  I used frozen lemon zest.  I have lemon, lime, and orange zest in my freezer in little prescription containers so I always have some on hand.

This is a sweet pasta dish.  I thought it might be a little savory due to the thyme, but it's really not.  It's not overly sweet, just has a hint of sweetness.  It's a fresh, new taste for me.  I love the figs in the dish.  I think I needed to add more water to the barley and let it cook a little longer than it did as it's not as tender as I would like it, but overall, it's good.  
For those of you who would like to try the recipe, I've listed it below with my changes in parenthesis.  I did not use nuts, although I had some almonds.  I didn't feel like toasting them.  I can see where almonds would add a wonderful element to this dish.  I'll have leftovers.  I think I'll toast some almonds to sprinkle on the leftovers when I have them.

Barley and Bow Tie Pilaf with Figs, Lemon, and Thyme

2 T. olive oil, divided
1 c. chopped yellow onion
1/2 c. pearl barley
1¼ to 1½ c. broth (I used at least 2 c., maybe more of veggie broth)
8 oz. bow tie pasta (I used mini penne pasta)
1 c. figs, stemmed and halved or quartered
½ c. chopped, toasted almonds, walnuts, or pecans (optional)
3 T. chopped fresh thyme leaves or 1 t. dried thyme leaves (I used ½ t. ground thyme)
1½ t. finely grated lemon zest (I used frozen)
salt, to taste (optional ... I didn't use any salt)

Heat half of the olive oil and saute onion until golden; add barley and saute 2 more minutes.  Add broth (I added 1½ cups to start); cover and simmer for 35 minutes.  Add figs and cook for an additional 5 minutes adding more broth if necessary.

While barley is simmering, cook pasta.  Drain, put in a bowl, toss with rest of olive oil.  Stir in barley, and spices.  Serve warm.  Variations include adding ½ c. browned TVP or tofu chunks.

It's a nice alternative to regular pasta.  Although I won't have this as one of my regular dishes, I think it's good for an annual fig, barley, and pasta pilaf.

Sunday, September 12, 2010

Veganomicon Penne Vodka

I recently ordered the cookbook, Veganmonicon from Amazon.  Someone in a vegan Yahoo! group recommended it.  I was reading old blog reviews by Cooking the Vegan Books and came across a review for this recipe.  The review is actually from February 16, 2009, but it was right on time for me today.
The sauce has a little zing to it due to the crushed red pepper.  The almonds made it amazingly creamy.  The fresh basil added a wonderful taste and aroma to the dish.  It took me about 40 minutes from start (turning the stove on to boil the water for the pasta) to finish (topping the bowl with chopped fresh basil).  It was truly a delight.

The test for this dish is that I made it for dinner for my sons, too.  When my youngest son came out to get his bowl of pasta, he asked me if it was a vegan dish.  I have to admit, I said no.  To divert his attention from the vegan question, I told him it had vodka in it.  :::smile:::  Technically, I wasn't lying to him.  He put a tablespoon of shredded Romano cheese on his, so his dish was only vegetarian, not vegan.  Same for my oldest son, but he didn't ask me if it was vegan.

My youngest son scarfed his pasta down and then went back for another full bowl of pasta.  He really enjoyed it.  My oldest son ate all of his, too, but I suspect the almonds, although mostly mixed it, still were too grainy for his tastes.  (Although neither son knew there were almonds in the sauce.)  Next time I make it, I'll use the immersion blender longer to make it creamier and less grainy.  After they eat it the next time, I'll tell them it's a vegan dish.  I figure if they really like it two times, then they won't blink when they learn it's vegan.

In Search of the Perfect Pancake ...

Pancakes are a Sunday morning staple.  We don't have them every Sunday, but we have them once or twice a month.  Since doing the 21-Day Vegan Kickstart, I have been in search of a great pancake recipe without using eggs.  I have found a few pancake recipes in my favorite cookbooks, but they have corn added (no way for Sunday  morning) or other ingredients (fruit) that won't fly with my sons. 

I found a recipe for Pancakes on page 68 of The Joy of Vegan Baking.  It sounded like a pretty straightforward recipe, the closest I had come across, in my short search, to pancakes made with eggs.  I made the recipe this morning.  (Unfortunately, I did not take pictures of the pancakes.)  The pancakes have a good flavor, but they just seemed very heavy to me.  My oldest son, the pancake judge and ultimate pancake lover of the house, came back for seconds, so these were good, they were just very dense.  My preference is for a much lighter pancake with a flavor leaning toward vanilla (this recipe uses maple syrup or fruit juice ... I used the syrup in mine).  

So, my search has begun and will continue until I find a pancake recipe that fits all of my preferences.  I'm sure I'll find one.  It took me a year or so to perfect the pancakes I used to make.  Hopefully, it won't take that long this time.  Next Sunday, I'm going to make Sweet Potato Waffles on page 52 in Vegan Comfort Food.  I'm going to have these with the Pear Syrup I made at the end of August.  Seems like it will be a good mix of flavors.  I'll be sure to take pictures next week.

Monday, September 6, 2010

Hunan Fried Rice

For dinner tonight, I made Hunan Fried Rice on page 188 of the Vegan Fire and Spice cookbook by Robin Robertson.  The flavors in this dish are very good.  I added about 1 teaspoon red pepper flakes for a bit more spice, but it still wasn't spicy enough for my liking, so I'll add more the next time I make it.
After making brown rice and putting 3 cups in the refrigerator to cool and marinating the tofu, I chopped veggies and added the red bell pepper and green onion to the pan.  

I threw in a cup or so of cabbage, and sauteed the veggies for 2 minutes until they were tender crisp.
After two minutes, I added the marinated tofu and cooked it until the marinade was absorbed.
Finally, I added about 3 cups of brown rice and sauteed it until the rice was heated through and it was thoroughly combined with the tofu mixture.
It may have been prettier if I had used white rice, but I was going for nutrition, so I used a brown rice mixture.  

I really like this dish.  I think it has great flavors that melded really well.  I will make it again.  However, when I make it again, I'm going to try a few changes to see if I can perfect it to my specific liking.  

I didn't like the tofu cubes.  They weren't browned as they were added after the veggies had cooked.  This resulted in a spongy texture.  I've only eaten tofu a couple of times, so this was new to me and was very disturbing at first.  Most traditional fried rice dishes have scrambled egg in them,  not cubes of egg.  The next time I make this, I'm going to try making a tofu scramble and set it aside and then add it where the recipe calls for it.  If that's not successful, then I'll brown the tofu and add the browned cubes.  I think that would actually add be a better choice as it would add more flavor to the dish. 

Another change I'll make is adding more cabbage.  Instead of 1 cup, I'll add 2 cups at least.  I so enjoyed the cabbage in the dish.  It was just yummy!  And, of course, I'll add more red pepper flakes, probably a tablespoon.  This is in addition to the cayenne pepper that the recipe lists, although that's only 1/4 teaspoon, so that's not much heat at all.  In fact, this would be good with the browned tofu cubes without the rice.  That would be an excellent.  I had no clue that I would like stir fried cabbage so much, but I am definitely HOOKED!

This is the first dish I have made out of the Vegan Fire and Spice cookbook.  It was a winner!  I will definitely be trying more recipes out of this cookbook.

Day 1 - 21 Day Kickstart - Banana Bread Steel Cut Oats

Today is the first day of the 21-Day Kickstart.  I'm ready for this.  This morning, I am drinking my coffee black.  I only used cream in it (half-n-half), so it was just a matter of not using it.  I don't have any in the house, so that part was easy.  I have tried soy creamers (blech!) and almond milk (it's OK), but I really want to move away from any creamer in it.  So, I'm having my second cuppa joe without creamer and it's good.  I'm sipping it while eating steel cut oats.  I made up my own recipe for today's breakfast (OK it's almost noon, so brunch, whatever!).  :)

I cook my steel cut oats in my rice cooker.  It's a simple rice cooker with only two settings:  warm and cook.  The oats come out perfect every time.

Banana Bread Steel Cut Oats

1/2 cup steel cut oats
1 cup water
1/2 teas. salt
1 teas. cinnamon
1/4 teas. nutmeg
1 to 1 1/2 teas. vanilla
1/4 cup banana chips (if you use fresh banana, add it when the oats have finished cooking)

Threw it all in my rice cooker and hit COOK.  This made enough for 2 servings, so I'm eating half now and the other half is in my fridge for tomorrow's or Wednesday's breakfast.  I poured a splash of regular almond milk on it (but I suspect this would be very good with the vanilla flavor), and a sprinkle of brown sugar (use the sweetener of your choice).  It's very tasty!  I'll be making this one again.

Saturday, September 4, 2010

Homemade Sauerkraut

Beth is in the Eat 2 Live Yahoo! group to which I belong.  A couple of weeks ago, Beth posted a simple recipe for homemade sauerkraut.  It called for 4 cups of shredded cabbage.  So, of course, I bought a head of cabbage not knowing that one head of cabbage will produce at least 16 cups of shredded cabbage.  Each quarter of the cabbage was slightly more than 4 cups.  Who on earth knew?!?!?!  Obviously, I have never bought a head of cabbage and shredded it before.  OK, if I'm honest, I've never bought a head of cabbage before ever.  
So, I made the sauerkraut and will leave it on the counter for 3 days to do whatever it's supposed to.  I've never made it before, so I'm hoping that I actually like it.  I'm going to make stir-fry rice with 1 cup of the cabbage from the Vegan Fire and Spice cookbook.  Now, I just need to figure out what I'm doing with the other 7 cups.  Sheesh!  I found a recipe for a soup that I think looks good on 101 Cookbooks, it's a Simple Farro Bean Stew, although I have no clue if I'll be able to find farro, so I may have to substitute pearled barley for it.  Those are both going to be projects for tomorrow since it's nearly 8PM now.  I'll post pictures of them tomorrow.